Если вы произнесете слово “слот-машина”, в воображении разных поколений возникнут совершенно разные образы. Один представит себе тяжелый чугунный аппарат в углу прокуренного салуна, требующий физической силы для нажатия тугого рычага. Другой — ряд мигающих электронных кнопок в роскошном казино Лас-Вегаса. Третий же мгновенно откроет на своем смартфоне приложение, представляющее собой полноценный кинематографический мир с сюжетом, персонажами и сложнейшей анимацией.
Игровой автомат — это не просто развлечение; это живая летопись технологического прогресса. Ни одна другая азартная игра не отразила так точно и полно дух своего времени. Ее эволюция — это не просто смена корпуса или символов. Это фундаментальная трансформация от простой механики к облачным вычислениям, от физического объекта к виртуальной концепции. Проследив этот путь, мы можем не только понять, почему слоты стали глобальным феноменом, но и заглянуть в ошеломляющее будущее, где грань между игрой и реальностью начнет стираться.
Рождение Легенды: Эра Механики и “Одноруких Бандитов”
История нашего героя начинается в Сан-Франциско конца 19-го века, в эпоху золотой лихорадки и механических чудес. В 1890-х годах баварский иммигрант по имени Чарльз Август Фей, механик по призванию, создал машину, которая навсегда изменила мир досуга. Его творение, “Liberty Bell” (“Колокол Свободы”), было гениально в своей простоте. Оно имело три внутренних барабана, вращающихся независимо друг от друга, и пять символов: подковы, алмазы, пики, червы и тот самый Колокол Свободы.
Но революцией были не барабаны. Революцией стала система автоматических выплат. До Фея существовали примитивные игорные автоматы, но они требовали присутствия владельца заведения для выдачи выигрыша (например, сигары или бесплатной выпивки). “Liberty Bell” был автономен. Если на единственной линии выплат выпадали три Колокола Свободы, машина сама отсчитывала и высыпала игроку джекпот — целых пятьдесят центов.
Эта инновация взорвала рынок. Машина, которая платит сама, без участия человека, стала сенсацией. Она создала тот самый мгновенный цикл “действие-вознаграждение”, который лежит в основе психологии слотов и по сей день.
Вскоре наступила эра запретов. Азартные игры в их прямой форме были объявлены вне закона во многих штатах. Но изобретатели нашли гениальный обходной путь. Чтобы машина не считалась игорной, ее переквалифицировали в… торговый автомат. Вместо денег она начала выдавать жевательную резинку или конфеты. Именно отсюда берет начало иконическая символика “фруктовых машин”. Символы вишни, лимона, сливы и апельсина представляли вкусы жвачки, которую можно было выиграть. А знаменитый символ “BAR”? Это был просто стилизованный логотип производителя этой жвачки, компании Bell-Fruit Gum.
Этот период также подарил автоматам их знаменитое прозвище — “Однорукий бандит”. “Однорукий” — из-за массивного бокового рычага, который нужно было тянуть, чтобы запустить механизм. “Бандит” — потому что он так же неумолимо забирал ваши монеты.
Опыт игры в ту эпоху был глубоко тактильным и физическим. Игрок стоял перед тяжелой железной машиной. Он вкладывал настоящую монету, ощущая ее вес. Он физически тянул рычаг, прикладывая усилие, что создавало мощную иллюзию контроля — будто сила рывка могла повлиять на результат. И, наконец, он слышал самый желанный звук в мире — грохот металлических монет, сыплющихся в лоток. Это была эпоха железа, пружин и шестеренок.
Электрический Шок и Рождение “Джепота”
Десятилетиями механическая формула оставалась неизменной. Настоящий сдвиг парадигмы произошел лишь в 1960-х годах с приходом электричества. Первопроходцем стала компания Bally, которая в 1963 году представила “Money Honey”.
“Money Honey” был электромеханическим гибридом. Рычаг все еще был на месте, но он стал в значительной степени ностальгическим атавизмом; механизм теперь приводился в действие электродвигателем. Но главной инновацией, изменившей индустрию, стал “хоппер” (hopper).
Хоппер — это внутренний моторизованный бункер для монет. До его появления автоматы могли хранить и выплачивать лишь небольшое количество монет, помещавшихся в узкие трубки. “Money Honey” с его бездонным хоппером мог накапливать тысячи монет. Это означало, что джекпоты стали огромными. Машина могла автоматически выплатить 500 монет и более, не требуя вмешательства персонала. Именно хоппер сделал возможным появление прогрессивных джекпотов и превратил слоты из мелкого развлечения в аттракцион, способный изменить жизнь.
Вместе с электричеством пришли и новые сенсорные триггеры: загорающиеся лампочки, электрические звонки, оповещающие о выигрыше. Игра стала громче и ярче.
Следующий логический шаг был неизбежен. В 1976 году компания Fortune Coin Co. из Лас-Вегаса представила первый в истории видеослот. Вместо вращающихся механических барабанов он использовал модифицированный 19-дюймовый телевизор Sony.
Поначалу игроки отнеслись к новинке с глубоким недоверием. Они не могли “видеть” механизм. Им казалось, что цифровой экран — это обман, заранее запрограммированный на их проигрыш. Им не хватало тактильной связи с физическими барабанами. Однако, когда Комиссия по азартным играм штата Невада после долгих проверок сертифицировала технологию как честную (благодаря тому самому ГСЧ, о котором мы говорили в первой статье), лед тронулся. Вскоре компания IGT выкупила Fortune Coin, и цифровое будущее стало реальностью.
Эта эра стала мостом. Она взяла физический опыт “однорукого бандита” и наэлектризовала его, сделав джекпоты больше, а сенсорный опыт — ярче. Она подготовила почву для полного отказа от физического мира.
Цифровой Взрыв: Интернет, Бонусы и Мобильность
Если электричество было шоком, то интернет стал “Кембрийским взрывом” для слот-игр. В середине 1990-х годов, с появлением первых онлайн-казино (пионером считается Microgaming), игровой автомат совершил немыслимый скачок: он полностью отделился от своего физического тела.
Игра перестала быть машиной в углу. Она стала чистым программным обеспечением — набором кода и графики, живущим на сервере. Это освобождение от физических ограничений привело к лавине инноваций, которая и сформировала современные слоты.
- Смерть 3-х барабанов: Механические барабаны были сложными и дорогими в производстве. Зачем ограничиваться тремя, если на экране можно нарисовать пять? Или шесть? Пятибарабанные видеослоты быстро стали отраслевым стандартом, предлагая экспоненциально большее количество комбинаций.
- Революция Линий Выплат: Один горизонтальный ряд по центру? Слишком скучно. Программное обеспечение позволило создавать линии выплат любой формы: зигзаги, V-образные, диагональные. Количество линий выросло с 1 до 5, 9, 25, 50, а затем и вовсе было заменено системами “243 Ways to Win” (где любой символ на смежных барабанах формирует комбинацию). Кульминацией стала механика Megaways от Big Time Gaming, где ГСЧ в каждом спине случайным образом меняет количество символов на каждом барабане, создавая более 100 000 потенциальных способов выиграть.
- Изобретение Бонусного Раунда: Это, возможно, самое важное изменение в психологии игры. Разработчики поняли, что могут программировать “игру в игре”. Теперь целью игрока стало не просто собрать три вишенки. Целью стало поймать три “скаттер” символа, чтобы запустить бонусный раунд. Этот раунд переносил игрока на новый экран, предлагал бесплатные вращения (фриспины) с множителями, интерактивные мини-игры (выбери сундук, открой дверь) и совершенно иной уровень вовлечения. Игра приобрела нарратив и кульминацию.
- Тематический Взрыв: Пока слоты были механическими, их темы были ограничены фруктами и цифрами. Став программным обеспечением, они смогли стать чем угодно. Появились слоты, основанные на древнеегипетской мифологии (легендарный “Book of Ra”), скандинавских богах, популярных фильмах (“Jurassic Park”, “Gladiator”), рок-группах (Guns N’ Roses) и фэнтезийных мирах. Слот превратился из игорного аппарата в полноценную форму тематического развлечения.
Последним шагом в этой эре стал скачать бк Мелбет на андроид и последовавшая за ним мобильная революция. Слот покинул не только казино, но и домашний компьютер. Он перекочевал в наш карман. Доступность стала абсолютной — 24/7, в любом месте, где есть сигнал сотовой связи.
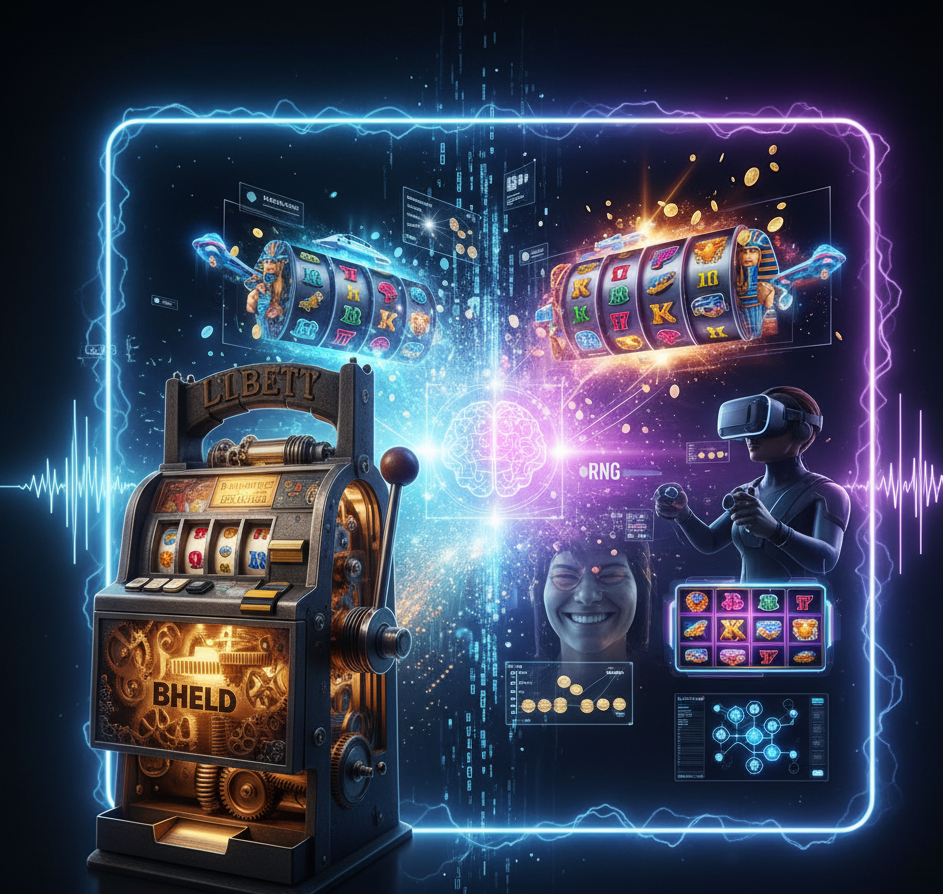
Взгляд за Горизонт: Метавселенная, ИИ и Прозрачность
Эволюция далека от завершения. Мы стоим на пороге следующего великого сдвига, и он будет определяться тремя ключевыми технологиями.
1. Полное Погружение (VR и AR) То, что сейчас происходит на плоском экране, скоро станет объемным. Слоты в виртуальной реальности (VR) уже существуют, но они станут мейнстримом. Представьте, что вы надеваете гарнитуру и не просто видите игру, а входите в нее. Вы стоите у подножия гигантской ацтекской пирамиды, которая и есть слот-машина. Вы физически тянете виртуальный рычаг и наблюдаете, как каменные блоки размером с дом вращаются перед вами. Дополненная реальность (AR) пойдет другим путем: она “спроецирует” игровой автомат на ваш кухонный стол, позволяя вам взаимодействовать с ним в реальном окружении. Это переход от просмотра игры к пребыванию в ней.
2. Геймификация и Элементы Мастерства Поколение, выросшее на Fortnite и Call of Duty, требует большего, чем просто нажимать кнопку и надеяться на удачу. Будущее слотов — это гибрид азарта и мастерства. По закону, основной результат спина всегда будет определяться ГСЧ (случайностью). Но бонусные раунды могут измениться. Представьте, что, получив фриспины, вы попадаете в 3D-шутер от первого лица, где отстреливаете монстров, и каждый убитый монстр добавляет множитель к вашему выигрышу. Или бонусный раунд в виде гонки, где ваш навык вождения напрямую влияет на итоговый приз. Это привлекает новую аудиторию, которая ценит иллюзию (или реальность) влияния на результат.
3. Искусственный Интеллект и Блокчейн ИИ уже используется для персонализации. В будущем слот-игра будет в реальном времени адаптироваться под вас. Она проанализирует ваш стиль: вы любите частые мелкие выигрыши или предпочитаете рисковать ради джекпота? ИИ сможет динамически настраивать музыку, темп, визуальные эффекты и даже предлагать бонусы, которые с наибольшей вероятностью удержат именно вас.
Блокчейн же решает главную проблему индустрии — доверие. Технология “Provably Fair” (“Доказуемая Честность”) позволяет игроку самому проверить результат спина. Используя криптографические хэши, игрок может после спина убедиться, что результат не был подтасован казино в последнюю секунду. Это создает уровень прозрачности, о котором Чарльз Фей не мог и мечтать.
От чугунного “Колокола Свободы” до персонализированного VR-аттракциона, управляемого ИИ, — путь слот-машины поражает. Она была механической, затем электрической, затем цифровой, затем мобильной, а вскоре станет иммерсивной и децентрализованной.
Но при всей этой невероятной трансформации, фундаментальная ДНК игры, заложенная более 120 лет назад, остается неизменной. Простой, почти ритуальный акт (дернуть рычаг или нажать кнопку), миг захватывающего предвкушения и непредсказуемый, но потенциально изменяющий жизнь результат. Слот-машина — это идеальный технологический хамелеон. Она всегда будет отражать дух своего времени, облекая вечную магию азарта во все более совершенную и соблазнительную форму.
 Westerly RI Fence Install: A Comprehensive Guide to Enhancing Your Outdoor Space